
A hands-on assignment from the Graphic Workshop
Do you like drawing or... cooking or both?
Then this is definitely something for you!
A basic recipe for making your own ink from herbs or green materials. You can use the ink to draw on paper, but you can also draw on a T-shirt or a piece of fabric. A little help from parents is handy, and never do this without consulting them!
Ingredients for your ink
- water
- a colorful basic ingredient
- (such as turmeric or paprika from the kitchen, berries, plant material (flowers, leaves, roots for example, chestnut husks), henna powder, anything that has a lot of color)
- binding agent such as: cornstarch, gum arabic, guar gum or a starch
- whole cloves
- salt/alum
- white/clear vinegar (cleaning vinegar if you can find it)
Tools
- small saucepan and a large pan (remember: a large one to sterilize in!)
- spoon or spatula for stirring
- potato masher or immersion blender
- stove or hob
- glass jar with lid, one or more knives
- large bowl / bowl
- fine sieve or colander
- funnel or coffee filter plus coffee filter bag
- rubber gloves
- strips of paper
- cleaning supplies
Step 0 sterilize your glass jar and lid (and preferably also the tools you use):
(this is to keep your homemade ink longer without it getting moldy)
- Place the jars and lids in a large pan
- Add enough water so that everything is submerged and ensure there are no air bubbles
- bring the water to a boil and let it boil for 5 minutes
- Turn off the heat and let cool completely in the pan
Recipe for making ink
Step 1
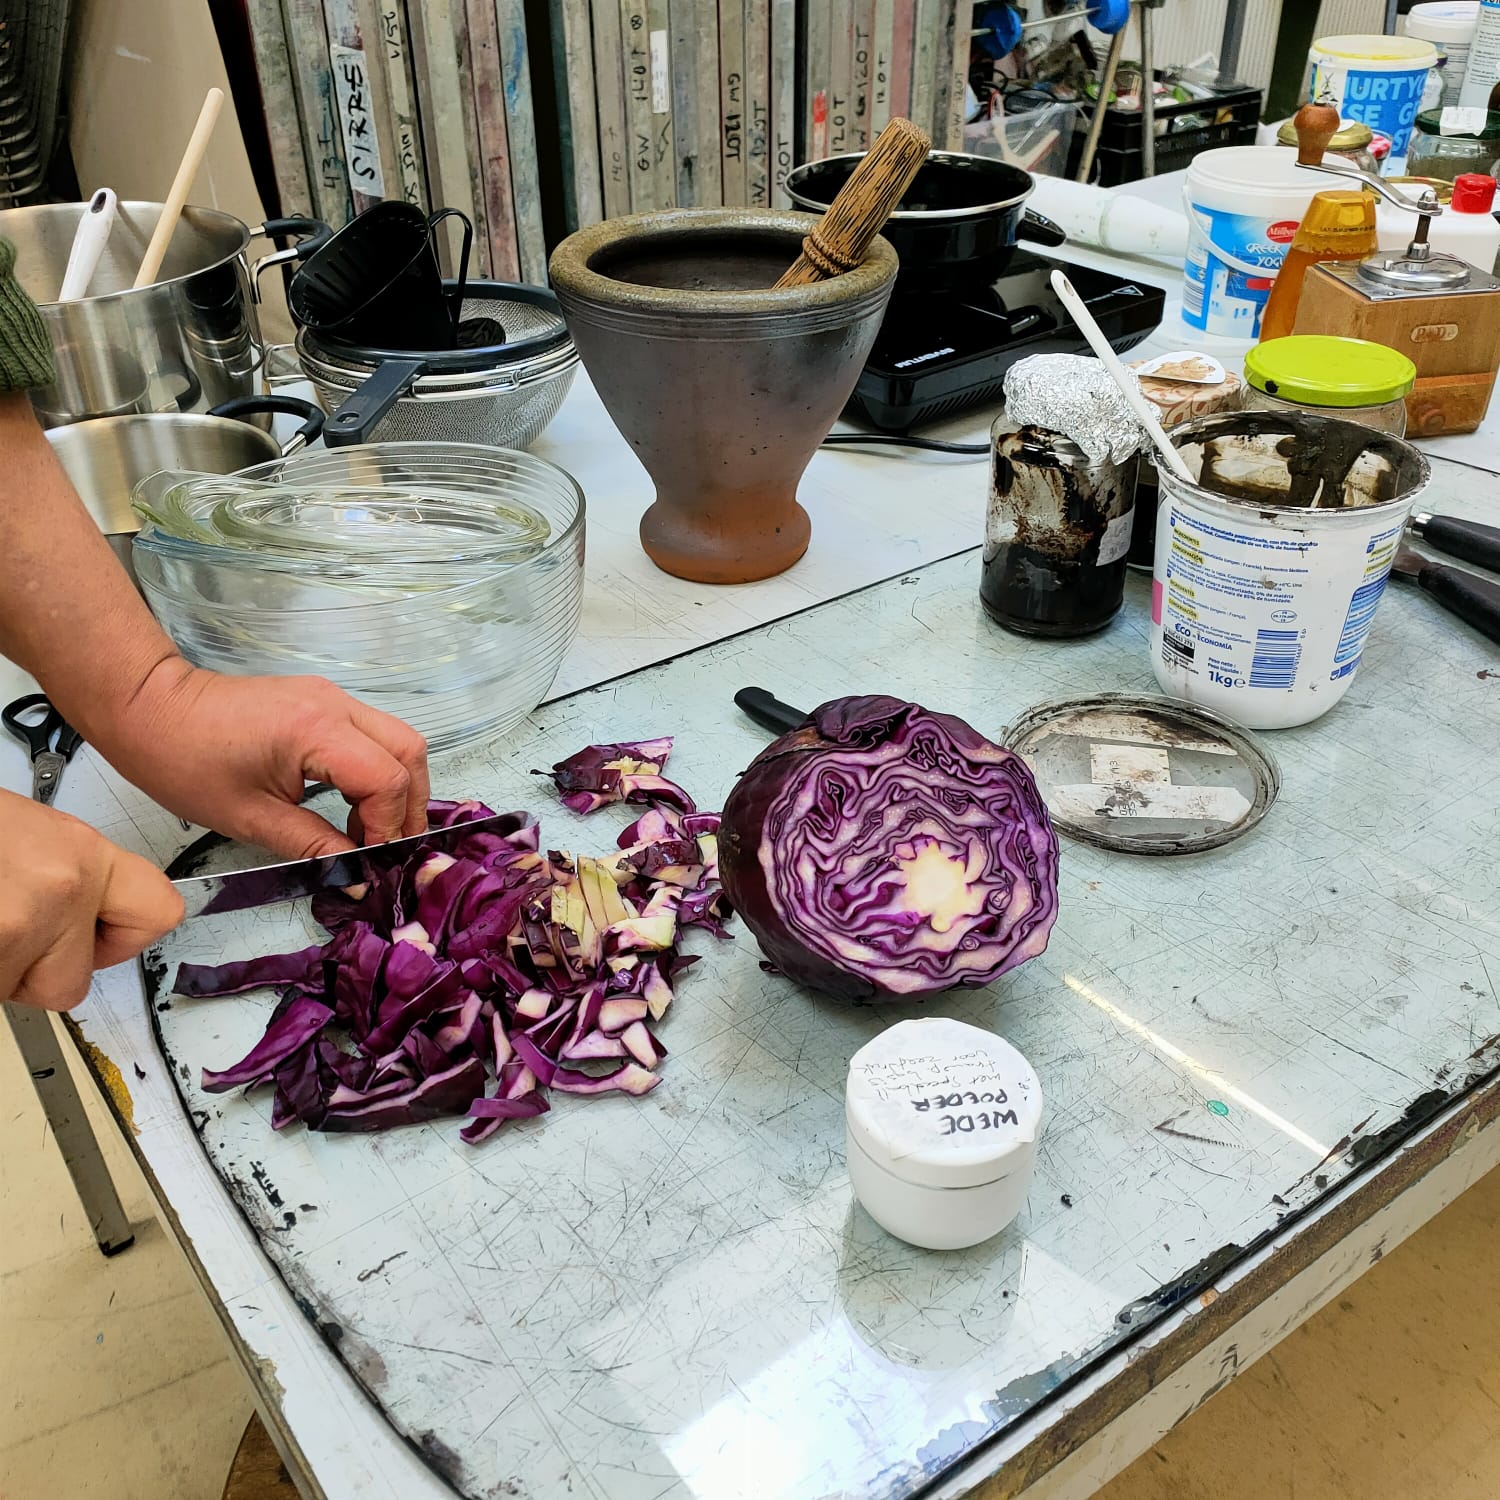
Find a basic ingredient, for example turmeric or paprika from the spice rack, half a red cabbage cut into pieces, some henna powder, finely chopped chestnut husks from the forest. You can gather the husks in the autumn once they have fallen from the tree – put on gloves!, because they are best soft and half-rotting, but they immediately release color…
Step 2
Mix it with some salt and vinegar (note: vinegar can change the color) in water. A guideline is that your base ingredient should be just submerged.
For herbs
You can mix the herbs with water right away. This works best if you rub the water through the powder little by little with a spatula on a plate or tray. Once you have a thin paste, you can either use it as is or stir it into more water in a jar.
For berries:
½ cup (120 ml) water + 2 cups (450 g) crushed berries
For nuts/ leaves/ flowers:
2 cups (480 ml) water + 1 cup (120 ml) plant material (in pieces)
Optional: 2 tablespoons of vinegar and 1 tablespoon of salt (at the specified quantities) will intensify the color. Be aware that the vinegar can change the color because it sometimes alters the pH. (e.g., with red cabbage: red without vinegar, blue-purple with)
Step 3
Cook it until you get a color you like. Often, cooking for about an hour is sufficient to extract all the color from your ingredient. Just be careful that it doesn't boil dry! The water can evaporate quickly! Turning the heat down a bit and putting a lid on helps, but keep a close eye on it.
To test the color, dip a piece of paper in the ink and see if you like the color. Note: stay near the stove and make sure you don't forget.
Tip: use a kitchen timer. If you set it to go off every 5 minutes, then check your pan and give it a quick stir, it should be fine.
Step 4
Sieve the ink into a bowl. You can also filter it afterwards using a coffee filter and coffee filter bag.
Step 5
Mix the ink with a thickener. To do this, first make a paste from cornstarch or starch with the thickener and some water before adding everything to the liquid ink. Stir well; it is handy to use an immersion blender for this.
- Add gum arabic : liquid gum is the most convenient. You can add this once your colored water has cooled down. Add as much as you like, but keep in mind that your ink will never be thicker than the liquid gum itself. Liquid gum arabic works very well as a binder with turmeric or another powdered ingredient.
- If you use cornstarch or starch, the ink may become slightly lighter in color. Add the cornstarch while the colored water is still boiling. Use a generous teaspoon per liter.
- If using guar gum: mix it into your colored water with an immersion blender when it is lukewarm. Mix for 5 minutes: you will see it thicken. Approximately a teaspoon per liter. Sprinkle a small amount on the liquid and mix well: do not add too much at once, as it will clump.
Step 6
Put the ink in a glass, tightly sealable jar (sterilized! see above) and place a fingernail on top to prevent mold. Store the ink in a cool place. Wash the kitchen utensils and put them away.
Now your ink is ready to use! Well: let it cool down first…
We are curious about the results!
When printing on fabric, it is best to iron it at a high temperature (be sure to place a piece of baking paper between the ink and the iron) once the ink is completely dry. This fixes the ink in the fabric, allowing you to wash it out at a low temperature (30 degrees or hand wash): very handy if you are decorating a T-shirt!